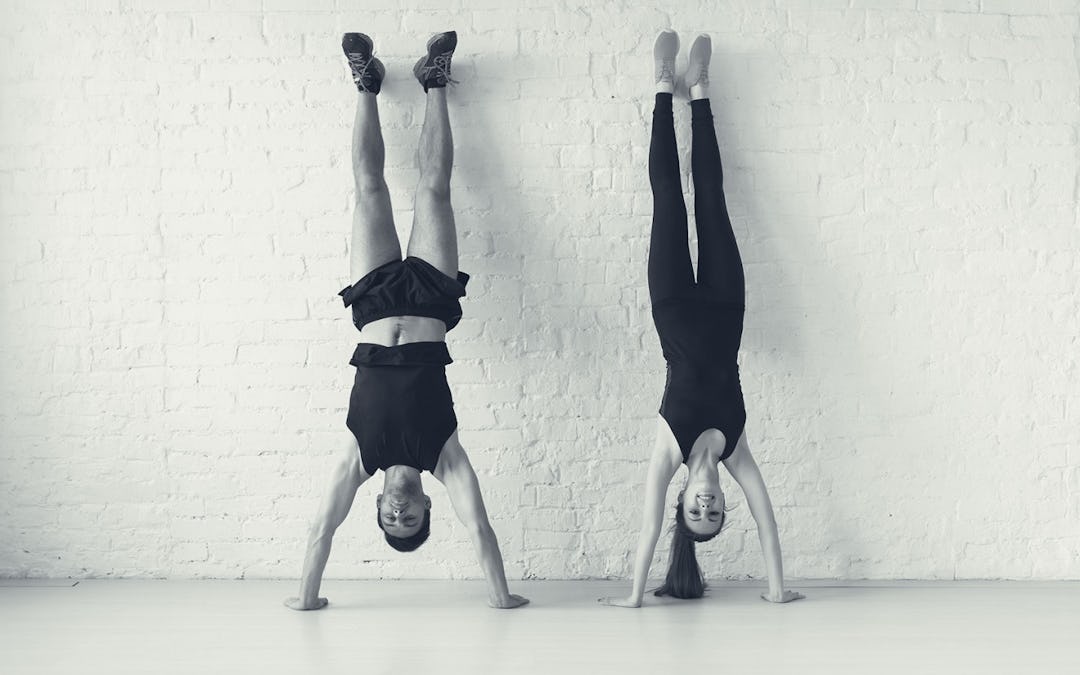
How to Get Into a Handstand? One of the most common questions asked by fitness enthusiasts.
It’s no secret that I love getting upside down and teaching others how to do it safely and successfully.
I also love getting down on the floor and exploring different movement patterns.
To me, they’re both extensions of the same thing, and this article is going to give you a practical demonstration of how basic movements can be used to strengthen more advanced skills.
Hand balancing training does so much for upper body strength and control, and I believe everyone should do some version of it in their exercise routine. Yet one of the sticking points in a beginner’s progress is the difficulty in getting up into the handstand in the first place.
This is why I’ll be showing you a way to get into the handstand with improved control and confidence.
It starts with a move called the Frogger.
Getting Maximum Value Out of the Minimum Number of Exercises
I know some people like to boast about the thousands of different locomotion moves they teach, but at our GMB Movement Seminars, I actually only teach three: the bear, the monkey, and… the frogger.
Why only three?
Because that’s all you need. Hidden in the variations for these three “simple” movement patterns are the principles of many more advanced moves and skills. If you want to get the full picture, you’ll need to attend a seminar or join Alpha Posse; but in this tutorial, I’m going to explain one example of how even “simple” locomotion practices can be applied.
How the Frogger Locomotion Pattern Applies to Hand Balance
One of the biggest problems people have when learning handstands is how to get into position with balance and control.
While most people learn the scissor leg kick up where you swing one leg up and the other follows, it’s actually harder to control the momentum and stay consistent in your entry to the handstand. The “tuck-up” transition offers more consistent stability and control – and the technique is very similar to the frogger movement.
I’ll explain the frogger tuck-up below, but first, let’s start with learning the frogger movement itself.
Basic Locomotion Pattern: The Frogger
The frogger, or frog jump, is a move you may have done as a kid, but it’s probably been a while since you’ve done anything like it. I’ve been teaching this move for a long time in my children’s classes and it’s great for motor control and body awareness as well as improving strength in the upper body and core.
Here’s a quick example of the frogger at three different levels of difficulty:
You can probably pick it right up, but to really get the most out of the move, I recommend spending sometime exploring the steps below.
Frogger Jump Step One – Finding Your Base
â Kneel down and place your hands shoulder-width apart on the ground in front of you.
â Rock back and forth between your hands and knees to get a sense of how your weight shifts on and off your hands.
â Don’t relax your shoulders, but rather, push down forcefully into the ground and feel how your stomach tightens as you lean forward more into your hands.
â Next, get your knees off the ground and come up onto your toes as you rock back and forth.
Practice this for just a few repetitions to get used to the motion.
Frogger Jump Step Two – Pushing Onto Your Hands
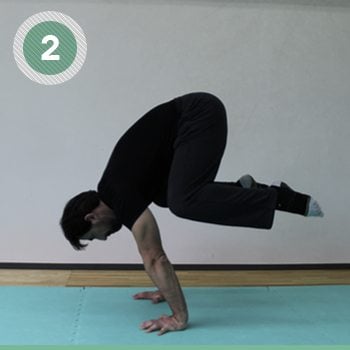
â Now, as you rock forward onto your hands, jump off your toes and bring your feet up toward your hands.
â The key here is to jump with control – the slower the better. This emphasizes using the strength of your arms, shoulders, and core to perform the move and not just the momentum of your jumping. This is why this is a great move for entry to a handstand – it builds up the exact strength you need in the right pattern.
Drill: Keep your hands on the floor the entire time and just jump back and forth. This is a great exercise for strength-endurance of your upper body and core.
Try it for 3 to 5 sets of 1 minute, and you won’t wonder “which muscles it works,” since it’s pretty much all of them.
Frogger Jump Step Three – Moving Forward with Your Jump
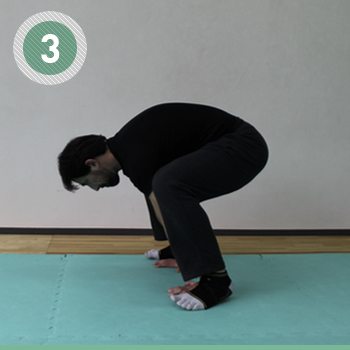
This step has you actually moving in a series of jumps.
â As in the last step, jump forward with control, but instead of jumping back to the starting position, bring your hands forward and repeat the movement.
â Here, the key point is placing your hands at the same width every time you pick them up and put them down again. Start with reaching forward just a bit and then reaching further as you get more comfortable.
Keep it slow and under control.
Drill: Once you’re comfortable moving forward, you can play around with going faster and even changing directions for more of an emphasis on conditioning. Simply play around with the movement and explore how you can move across the room.
Do this for 3 to 5 minutes to really get your heart pumping.
Frogger Jump Step Four – Bringing Your Frogger Higher
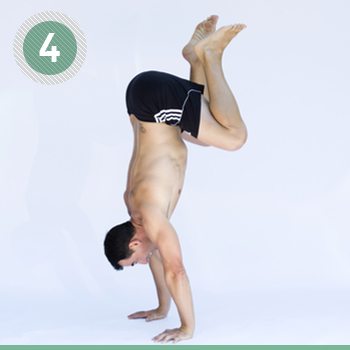
As your frogger smooths out, you can pick your hips up high in the air – and you’ll begin to see how this could be used to enter a handstand…
â Begin as before but now bring your shoulders over your hands and jump up with the intention of getting your hips directly above your shoulders.
â As you transition your weight onto your hands, lift your hips up towards your back and try to feel as if your lower body is “floating.”
It will likely take you more than a few tries to do this, but remember to push hard into the ground and be consistent in where you place your hands.
Drill: Vary how hard you jump and how far you lean forward before you jump. Each repetition becomes a lesson, so don’t be afraid to play around with how hard you jump, how high, and how long you can stay up in the air.
Spend 3 to 5 minutes experimenting with this.
Have Fun and Experiment
Work on these fundamental drills for the frogger consistently and with good effort, and you’ll unlock the key to improved strength and motor control from this great exercise.
Don’t be afraid to play with the movement. If you’re enjoying it, you’ll be open to learning more from each repetition.
Frogger to Handstand Transition Progressions
Once you’ve got your frogger movement down, it’s time to work on the frogger to handstand. If you did the drills and experiments above, how this works will make perfect sense.
In this video, I’ll show you easy step-by-step instructions for doing the frogger to handstand:
Work on each step methodically and aim for control and precision.
1. First, practice the frogger in place in front of a wall. Start with your hands about a foot away from the wall and simply practice jumping up in the air with your frogger. Don’t worry about holding or getting up against the wall. Simply practice and see how it feels.
2. Next, jump your legs up, but focus on driving your butt up against the wall, letting your feet follow your butt. Touch the wall and hold for a second or two, then come back down.
3. Finally, get away from the wall and work on jumping with the frogger to get your hips over your shoulders with control.
Some Notes on Practicing the Frogger Tuck-Up Handstand
When practicing against the wall, the goal is to touch the wall as softly as you can for control and accuracy.
In the beginning, it may feel like you are either slamming in to the wall or not even getting close to it. You’ll improve with practice. Don’t worry too much about straightening your legs or flattening your back.
Just focus on getting your butt against the wall and keeping the arms locked out.
Your wall work will give you better accuracy when you move away from the wall, and you’ll notice being able to hold the end position for a second or two. Keep working on this until you can regularly feel steady for a couple of seconds.
Get proficient with this and it will soon make going into a handstand more consistent, and give you more confidence to continue training your hand balancing with less flops and more steady repetitions.
“OK, I’m Upside-Down. Now What?”
Now that you’ve learned how to get upside-down with control, you can start refining your form.
Click here for an in-depth tutorial on the handstand, that will help you go through the steps needed to work on handstands confidently and safely.
Make sure to progress slowly through the steps and have a safe place to land if something goes awry.
The frogger move is one of many different ways to move your body on the ground and provides a nice progressive exercise for you to get used to bearing weight through your hands. Advance slowly and you’ll gain strength and body control while conditioning your wrists and hands for harder skills in the future.
I love teaching this in my classes and I know it will benefit you in your practice. So go get hopping!

)
