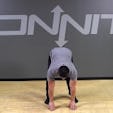
Push Ups are an essential exercise in your training. One area that I spend a lot of time addressing with my clients is the structure and strength of their most distal extremity, the hand, and wrist.
In my gym, I have a lot of fighters training, as well as a lot of regular folks, people who work at a desk for hours at a time. Some of the office folk even train to fight.
No matter how much you wrap the wrist and hand, either with boxing wraps for hitting or wrist straps for lifting, nothing is as good as actually developing flexible strength in the joints themselves.
It is possible to build the structure of the hand and wrist to withstand better the trauma of repetitively being slammed into targets or hoisting heavy weights.
But before I explain them, I will insist that you put your ego aside and work these in a slow progressive manner. Otherwise, the injury of risk from simply performing the exercises may outweigh the benefits.
Please note that these are all to be practiced without wraps or other artificial support.
Warming Up to Avoid Wrist Pain
Hold your hand out with your fingers splayed. Now, starting with the thumb, and only the thumb, make several circles in each direction. No other finger should move. Easy enough?
Good, now do this with each finger in turn: index, middle, ring, pinky, ring, middle, index, thumb. Do your best to have only the working finger move; all the others remain still.
It’ll take time to master this, but even after a single set on each hand, you’ll feel the hand and wrist is stimulated and invigorated.
Stretching to Avoid Wrist Pain
These were taught to me by instructors in Japanese Ju Jitsu and Aiki Jitsu, two arts that specialize in the destruction of wrists, yet conversely, the practitioners develop some of the most elastic wrists I’ve come across.
These stretches and the following Push Up variations are the reason.
There are five stretches in total; each will stress the forearm muscles in different directions. No stretch is to be held; they are all to be performed in a dynamic, yet controlled manner.
Move the joints smoothly through their entire range of motion, stretching and releasing the muscles as you go.
Just this information alone will go a long way towards protecting the hands, but we’re far from done. We will now add some strength. First of all, I’m a huge advocate of working the heavy bag with no or minimal protection at least some of the time.
Obviously, if you’re not used to punching the bag, get some instruction first, and then start easy (no, even easier than that!). A safer option for most people is to get down on the floor and work on the following Push Up variations.
As we’re going to be loading the wrist in unfamiliar planes, I can’t stress enough that you must develop these slowly and with great care.
Start on your knees with the minimal amount of weight placed onto the hands, and gradually add more load until the exercise can be done for repetitions in a full plank style Push Up.
Push Up Wrist Pain Variation # 1: Finger Pulses
Place the fingertips on the floor and gently pulse into them, feel the finger flexors load up and stretch and immediately release. Pulse in and out carefully and smoothly for reps.
Push Up Wrist Pain Variation #2: Palm Pulses
Place the hands flat on the floor as if you’re going to perform a regular Push Up. Now, while keeping the base of the knuckles on the floor, raise the palms up. Try to press yourself up; it’s like a calf raise for your forearms!
Smoothly work these for reps and enjoy the forearm pump.
Push Up Wrist Pain Variation #3: Wrist rolling
On your knuckles, roll forwards over the forefinger knuckle to try and touch the thumb knuckle to the floor, your elbows will be locked out straight here.
Now reverse, rolling back over the fist and the pinky knuckle, trying to get the bottom of the fist (hammer fist) to touch the floor. As you do this, the elbow will bend loading the triceps, but not so much that the stretch is lost in the wrist.
As you get stronger, move the knees further and further back until you can perform these on the toes.
Push Up Wrist Pain Variation #4: Back of Hand
There is a multitude of variations of this drill, but we’ll focus on the most essential and only showcase the more advanced versions in a separate video clip. Place the backs of the hands on the floor with the fingers pointing in towards each other.
Only place as much weight on the wrist to cause a mild discomfort (we don’t want pain).
With this one, work it to a full plank style Push Up, then start over with the fingers pointing straight back. Whichever of the two variations, try to keep the elbows rotated forwards so that as you lower into the Push Up the elbows stay in close to the body rather than flaring out wide.
Push Up Wrist Pain Variation #5: Fingertips
Simply get into a Push-Up position with the weight distributed in the fingers rather than on the palms. Imagine you are trying to hold a ball in the palm of your hand to further tension the finger flexors and prevent damage to the finger joints.
Once you’ve learned and developed some basic skills with these Push Up variations, you can get through them in just a few minutes.
I recommend people use the stretches and finger circles outside of the gym, integrating them into their lives, or just a selection of them as you warm up to train; you don’t need to do all the stretches every time.
From there use the Push Ups towards the end of your warm up before you lift. Perform 15 to 20 reps of each drill, 1 set of each in the order listed will take no more than a few minutes.
If you do these every warm up, you’ll very soon find the hands and wrists feel stronger and safer than ever before, which means you’ll be able to put more force through them, which in turn means better training.
If you want to spend more time on this often ignored region, here’s a bonus video clip from a few years ago covering a good selection of simple mobility drills that you can add into your day.
Now, take these drills and play with them, I’d be delighted to hear how you get on and how these exercises help you out.

)


