
Having a push day in your training week is a smart way to organize your exercises and make sure your training is as efficient as possible. Let this be your guide to designing push day workouts, choosing the best exercises for them, and how to balance your training over your whole program.
Key Takeaways
1. Push day workouts include all the upper-body muscles that push weight away from you—the chest, shoulders, and triceps. If you choose include lower-body pushing muscles as well, you can train the quads and calves on a push day.
2. Push days make your training easy to organize. In your next session, you can do a pull day, training all the pulling muscles, and balancing out all the work you did for the push muscles.
3. The best push day exercises include presses of any kind, lateral raises, and triceps extensions.
4. You don’t have to do conventional push exercises to build muscle and strength. There are many alternatives that will allow you to work around injuries and range of motion problems, such as landmine pressing variations.
What Is A Push Day Workout?
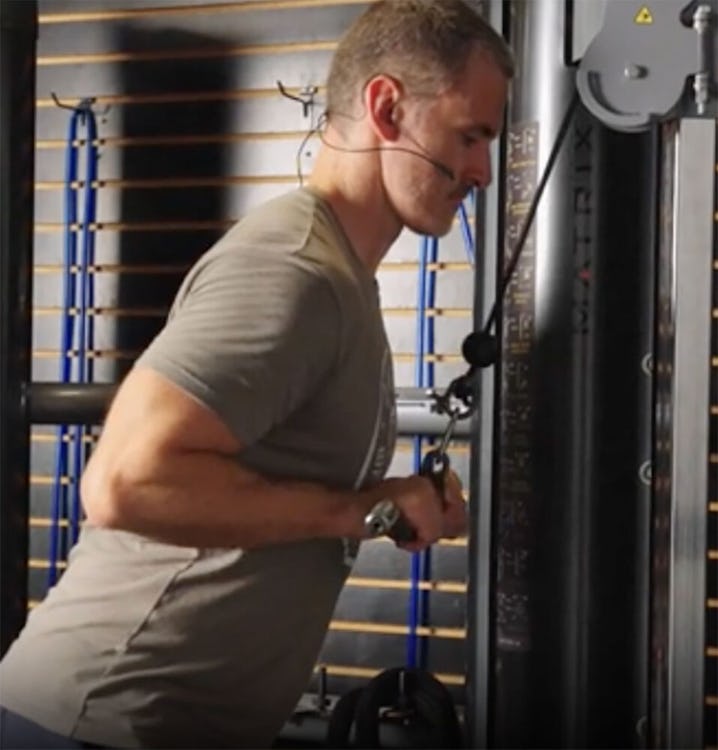
(See 00:19 in the video above.)
A push day is any workout where you train the muscles that push things away from you. That usually means the chest, shoulders, and triceps, but some people like to include the quads and calves too, as they are the pushing muscles for the lower body.
Generally, you start a push workout by working the biggest muscles first, and finish up with the smaller ones. So a good upper-body push day might begin with some chest presses, and then go to shoulder presses or lateral raises, and end with triceps extensions or pushdowns.
If you’ve ever been confused about which exercises to use on which workout day, organizing your training into push, pull, and leg days makes it pretty obvious. If you train chest, shoulders, and triceps on push day, you’ve covered one half of the upper body and hit all the muscles that work together to push.
On your pull day, you would want to balance that out by doing back and biceps exercises (sometimes rear delts too)—i.e., moves that have you pulling the weight toward you. You can then round out the split with a leg day that covers the whole lower body.
Muscles Targeted On Push Day
(See 01:16 in the video.)
A typical push day is going to work your¦
Pec major: the main chest muscle draws your arm in front of your body and up overhead.
Anterior deltoid: the delts assist in raising your arms in front of you and overhead.
Lateral deltoid: the outermost head of the deltoid, it raises your arm out to your side 90 degrees.
Posterior deltoid: the rear delt pulls your arm back and behind your body.
Triceps: the tris extend the elbow and help pull your arm downward from overhead.
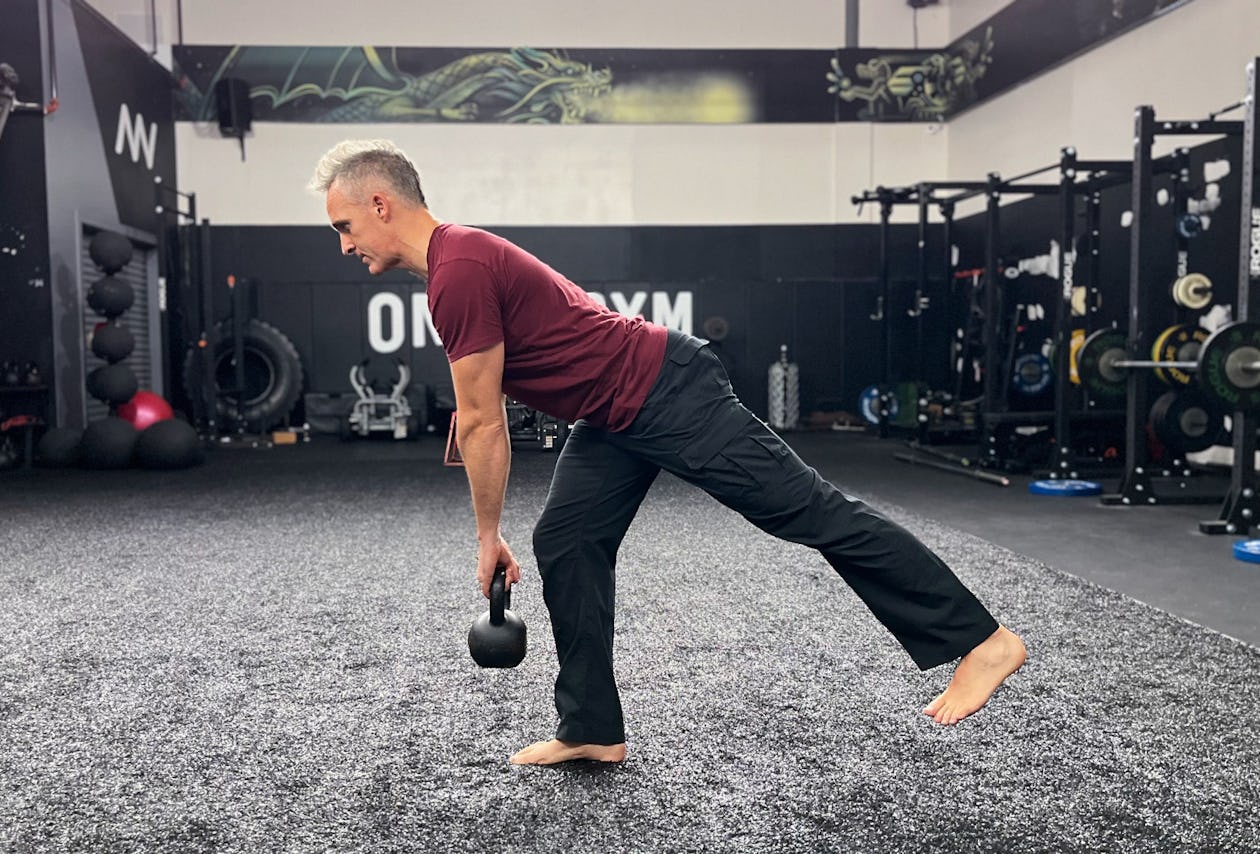
If you choose to work your lower body as well, the pushing muscles of the legs are the quads, and calves. The quads extend the knee and the calves raise your heels up.
Our Favorite Push Day Exercises For Maximum Gains
The best push day exercises are going to be ones that have a lot of potential for loading, so that you can get progressively stronger on them over a long period of time. That will allow you to keep building muscle over the long haul. They should also be exercises that you can perform safely and master the form on without too much trouble.
Some of our favorite push day exercises include the bench press, overhead press, triceps pushdown, and triceps extension. Any variation of these movements is fine. For example, you can do them with a barbell or dumbbells, cables or bands, and use a flat or incline bench.
Push Workout With Focus On Chest
If you want to emphasize your chest on your push day, start it off with one or two chest exercises, and then move on to shoulders and triceps.
Here’s an example of a chest-focused push day.
1. Bench press
Sets: 2 Reps: 5–8
Step 1. Lie on the bench and arch your back, pulling your shoulder blades down and together. Grasp the bar just wider than shoulder width, and pull it out of the rack.
Step 2. Take a deep breath, tighten your glutes, and lower the bar to your sternum, tucking your elbows to your sides at 45 degrees on the descent. When the bar touches your body, push your feet into the floor and press the bar up at the same time.
2. Low-To-High Cable Flye
Sets: 2 Reps: 5–10
Step 1. Set the handles on both sides of a cable crossover station to the lowest pulley setting. Grasp the handles, and step forward to lift the weights off the stack so that there’s tension on the pec muscles. If you don’t have access to cable stations, use elastic resistance bands attached to a rack or other sturdy object.
Step 2. Stagger your feet for stability, and let your arms extend diagonally toward the floor, in line with the cables—but keep a slight bend in your elbows. Your palms will face forward. Keep your torso upright and stationary throughout the movement.
Step 3. Contract your pecs to lift the handles upward and in front of your body. The upward path of motion should be in line with the clavicular fibers of the upper pecs—think: diagonal.
Step 4. At the top of the rep, your hands should be touching each other in front of you at around face level, wrists in line with your forearms. Lower the weight under control, back to the start position.
3. Cable Lateral Raise
Sets: 2 Reps: 5–10
Step 1. Attach single-grip handles to the low pulleys of a cable crossover station. Cross the cables over so your left hand grasps the one on your right side, and vice versa.
Step 2. Stagger your stance for stability, and raise the cables 90 degrees out to your sides. Control the descent. You can mimic the move with resistance bands if you don’t have cables.
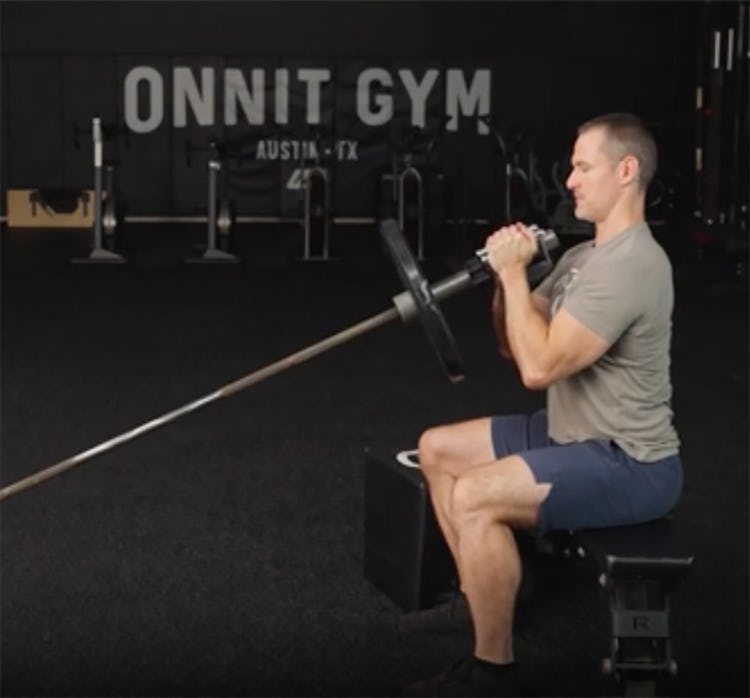
4. Lying Dumbbell Triceps Extension
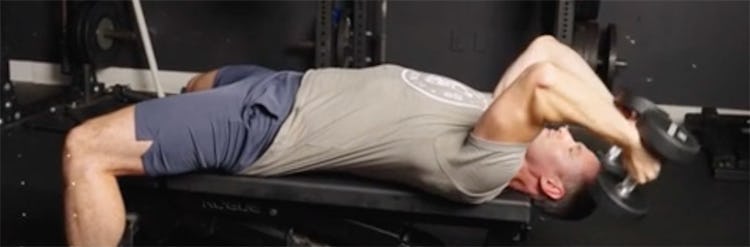
Sets: 2 Reps: 5–10
Step 1. Grasp a pair of dumbbells and lie back on a bench. Hold the dumbbells over and slightly behind your head so that your elbows are behind your shoulders—you should feel your triceps tensing. This will keep the triceps engaged even when your elbows are locked out, as opposed to resting at the top position when your arms are pointing straight up over your chest.
Step 2. Keeping your upper arms where they are, bend at the elbows and lower the weights behind your head. Extend your elbows to come back up.
See “Professional Tips” below for more notes on how to do this workout.
Push Workout With Focus On Shoulders
If you want to prioritize shoulder gains, start off with shoulder-focused exercises and then go on to your chest and triceps.
Here’s an example of a shoulder-focused push day.
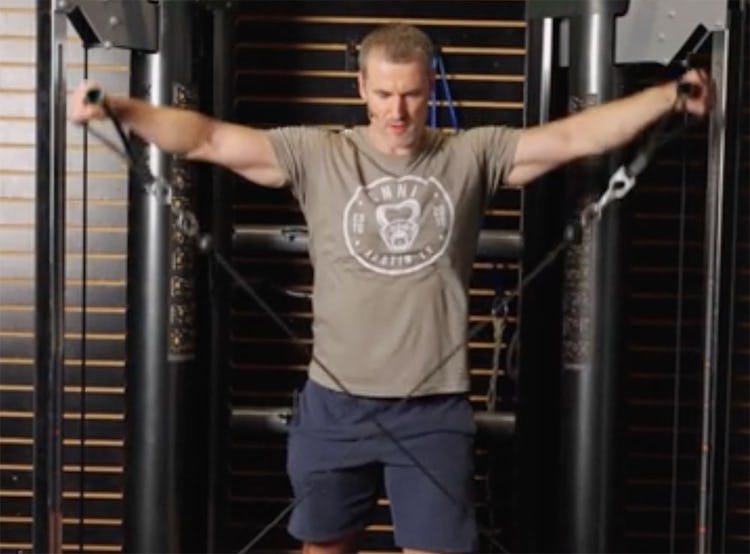
1. Cable Rear-Delt Flye
Sets: 2 Reps: 5–10
Step 1. Set both pulleys at an adjustable dual cable station to the height of your head. Attach single-grip handles to the cables, and grasp the handles with your palms facing down or each other. Crossing one arm over the other, and stand with your feet between hip and shoulder-width apart. You may want to stagger your stance for extra balance. Step back a bit so you feel tension on the cables and a light stretch in your rear delts before you even begin the set.
Step 2. Brace your core. Now drive your arms straight out to your sides while keeping a slight bend in your elbows, as if reaching out for the walls around you. Stop when your arms are 90 degrees.
Step 3. Lower the cables under control, and stop just short of where the weights touch down on the stack. You want to keep your rear delts working throughout the entire set, and letting the weight rest for a moment lets your delts rest too.
2. Cable Lateral Raise
Sets: 2 Reps: 5–10
Step 1. Attach single-grip handles to the low pulleys of a cable crossover station. Cross the cables over so your left hand grasps the one on your right side, and vice versa.
Step 2. Stagger your stance for stability, and raise the cables 90 degrees out to your sides. Control the descent. You can mimic the move with resistance bands if you don’t have cables.
3. Neutral-Grip Overhead Press
Sets: 2 Reps: 5–8
Step 1. Use a Swiss or football bar that allows your palms to face each other at about shoulder width. You can take the bar off a rack, or, if you don’t have one, simply pick the bar up off the floor and clean it to shoulder level. Stand with feet shoulder-width apart and tuck your tailbone slightly so that your pelvis is parallel to the floor. Draw your ribs down, take a deep breath into your belly, and brace your core.
Step 2. Press the bar overhead, pushing your head forward as the bar clears it so that the bar ends up just behind your head in the lockout position.
4. Dumbbell Bench Press
Sets: 1 Reps: 5–10
Step 1: Lie back on a bench with a dumbbell in each hand. If the weights are light enough, use your knees to kick them up into position as you lie back so you start the exercise with your arms locked out. (If they’re heavy, simply roll back and hold the weights at shoulder level). Starting in the top position will be safer for your shoulders and elbows, but if you’re an advanced lifter and very strong, you may not be able to get the weights up with that kicking motion. (You can also ask a buddy to help you get the dumbbells into position.)
Step 2: Slowly bend your elbows and pull your shoulder blades together on the bench, lowering the dumbbells until they are close to the sides of your chest and you feel a stretch in your pecs. In the down position, your elbows should be at a 45-degree angle to your torso—not straight out to the sides.
Step 3: Pause in the stretched position, and then press the dumbbells back up, flexing your chest as you push.
5. Cable Pushdown
Sets: 2 Reps: 5–10
Step 1. Attach a rope or cambered (angled) bar handle to the top pulley of a cable station. Angle your body slightly and put your bodyweight into the handle a bit to get stable and put tension on your triceps.
Step 2. Keeping your elbows at your sides, press the weight down and slightly forward, as if pushing yourself up out of a parallel-bar dip. This will allow you to go a little heavier and reduce some stress on the elbows.
Step 3. As you lower the weight, allow your shoulders and elbows to move back slightly so you feel like your muscles are coiling up like a spring. The movement is almost like lowering your body into a dip.
See “Professional Tips” below for more notes on how to do this workout.
Professional Tips: Progressive Overload and Adaptations to Prevent Injuries
The beauty of a push day is that the name itself tells you what to do. That is, just do pushing exercises. Your push day is not a time to do more curls because you think your arms need work, or back exercises that you should be leaving for your pull day.
Just keep it simple and limit yourself to one, two, or at most three exercises for a given muscle group. Understand that there’s a lot of carryover between push exercises, so you don’t have to do so much work overall. This means that your chest exercises are going to work your shoulders, and any pressing you do is also going to hit your triceps, so don’t get carried away.
Focus on progressive overload in your workouts: regularly trying to increase the weight you’re lifting or the number of reps you can perform for each move you do.
In the workouts outlined earlier, what you should do is start out with a weight that allows you five reps, with maybe one or two in reserve. In other words, do your set with a weight that you could perform six or seven reps with, but stop at five. Try to add a rep every time you repeat the workout, and when you reach 10 reps, increase the weight by two and a half to five pounds and start back at five reps again.
Adding too much weight before you’re ready is asking for injury, and so is doing too much volume. You only need a set or two per exercise to get stronger, and getting stronger will lead to bigger muscles over time. See “How Often To Do Push Workouts” below.
Alternative and Complementary Push Exercises
You don’t have to do all the so-called “standard,” basic exercises to build muscle. Nor do you have to do the old-school barbell lifts. As your training evolves through the years, your goals change, or you develop injuries that you need to work around, your selection of exercises will need to change as well.
Instead of using the bench press, you can target your pecs with dumbbell presses, cable chest presses, a variety of pushup exercises, and machines.
In place of overhead presses with a barbell, you can use a landmine press or a kettlebell press.
Here are some alternatives to a few of the exercises we laid out earlier, so you can customize your push day workout to your body’s needs.
Seated Incline Landmine Press
Use it in place of: incline bench press (barbell or dumbbell)
Works: upper chest
Using a landmine apparatus (basically just a cylinder to load the barbell into, and a swivel that allows it to move in any direction) lets you lift a barbell more like you’re throwing a lever. That arcing motion is often easier on your shoulders than pressing a bar straight up and down, so it’s a good alternative for people with injuries. This landmine press mimics an incline press for the upper chest. You just need a bench, weight collar, and V-grip handle (the kind you see on seated cable row machines) to do it.
Step 1. Set the bar in a landmine or wedge it into the corner of a room. Place a bench in front of it. Load the bar, and attach a collar to the bar just below where the V-grip handle will fit. Rest the end of the bar on the side of the bench. Now sit on the bench, place the bar in the crook of the V handle, and lift the bar into position in front of your chest with both hands. Sit with your hips and knees 90 degrees and your torso very tall. Brace your core.
Step 2. Press the bar upward to lockout. The resistance will drop off as you press the bar away from you, so the exercise will feel hardest at the bottom, but that’s right where you want it—when the upper chest is most active.
Half-Kneeling Landmine Press
Use it in place of: overhead press (barbell or dumbbell), incline press
Works: upper chest, front and side deltoids
Conventional barbell overhead presses can be hard on people who don’t have great shoulder mobility, or are coming back from shoulder injury. They can cause you to bend backward as you press upward, and it can be difficult to achieve a full range of motion at the shoulder. The half-kneeling landmine press allows you to use a neutral grip (palm facing in, rather than forward), which tends to feel better on the shoulder. It also frees up your shoulder blades to rotate fully, an action they don’t get to perform as well on bench-supported pressing exercises, and that supports long-term shoulder health as well as activation of more overall musculature. In short, the landmine variation is a very functional press, doable by almost anybody.
Step 1. Kneel on the floor with your left knee down and directly under your hips. Your right knee should be bent 90 degrees, and your stance about shoulder width. Tuck your tailbone under so your pelvis is level with the floor, and make sure you’re not kicking one hip out to the side. Pick up the bar and hold it at the end, about a fist’s space from your shoulder. Drive the downed knee into the floor so you feel your glute contract and help brace you.
Step 2. Press the bar up as high as you can while maintaining control, leaning forward at the top and reaching your arm up the best you can. Hold the top position for a moment.
Bottoms-Up Kettlebell Press
Use it in place of: overhead press (barbell or dumbbell)
Works: front and side deltoids, forearms and grip, core
If you struggle to perform any kind of press through a full range of motion without pain, the culprit is often a lack of stability. If you can train the rotator cuff and other muscles around the shoulder joints to clamp down on those joints, you may be able to press heavy and pain-free again soon. Turning a kettlebell upside down and lifting it with the bell pointing up is extremely hard to balance and control, making for a great stability challenge without the need for much weight at all.
Step 1. Stand with your feet shoulder-width apart and hold a light kettlebell by its handle. Clean it up, or simply pick it up into position at shoulder level. Draw your ribs down and brace your core.
Step 2. Press the bell straight overhead without allowing it flop over. Avoid bending or twisting to either side. You may find it helps to extend your free arm out to the side and squeeze your hand into a fist.
How To Stretch and Warm Up Before A Push Day Workout
(See 10:39 in the video.)
Use the following exercises to warm up and promote mobility before any push day workout.
1. Band Dislocation
The name sounds bad, and while it may feel like your shoulders are being wrenched out of their sockets for a split second, the dislocation is actually a great way to promote strength in the shoulders throughout a full range of motion.
Step 1. Hold an elastic exercise band with both hands outside shoulder width. Keeping your ribs down and core engaged, raise your arms overhead and behind you—don’t bend your elbows.
Step 2. Bring the band back over your head to the start position.
Standing T-Spine Twist
Step 1. Stand with feet at shoulder width and raise your arms out to your sides. Bend your arms and bring your fingertips together in front of you.
Step 2. Brace your core and your glutes and twist only your torso to one side. Try to avoid letting your hips move backward as you do. Extend your arm when you’re at your farthest point, and then come back to the starting position. Repeat on the other side.
Elbow Circle
Step 1. Hold your elbows against your sides, bend your arms, and point your thumbs behind you.
Step 2. Slowly rotate your arms away from you and toward the floor, making a big circle. Try to drive your shoulders back the whole time as well as your thumbs, so you really feel your elbows having to twist and extend.
How Often To Do Push Workouts
Because a push workout is so comprehensive, you don’t need a lot of other workouts in the week to train your whole body. As we said earlier, you can do push, pull, and leg workouts and cover everything. In this case, you could do a push workout on Monday, a pull workout Tuesday, take Wednesday off, and then do a leg workout on Thursday. On Friday, you would repeat the cycle, starting with a push workout again.
You can vary the exercises you do when you repeat the workouts so things don’t get stale. If you’re an intermediate or more advanced lifter, it’s a good idea to have A and B options for each workout day.
Ultimately, it’s smart to train each muscle group twice in a seven-day period. So if you do a push workout on Monday, you should do another one by Friday or Saturday. That’s enough time to recover but not so much time that you begin to lose adaptations. A 2019 study showed that muscle growth stops about 48 hours after a resistance-training session, regardless of how much volume you do. So training a muscle more frequently is likely a better strategy than bombing it one day per week.
Now if you choose to put leg exercises, such as squats for the quads and calf raises for the calves into your push day, things have to change a little bit. You can do your leg work before or after your chest, shoulder, and triceps work on your push day, and then your pull day would have to consist of back, biceps, rear delts, glute, and hamstring exercises.
In this kind of split, you’re really doing two full-body workouts but they’re organized according to muscles that push and pull. Note that when it comes to legs, it’s very hard to train quads without there being some overlap with glutes, and vice versa, so you may want to take one day of rest in between push and pull workouts that train the upper and lower body together.