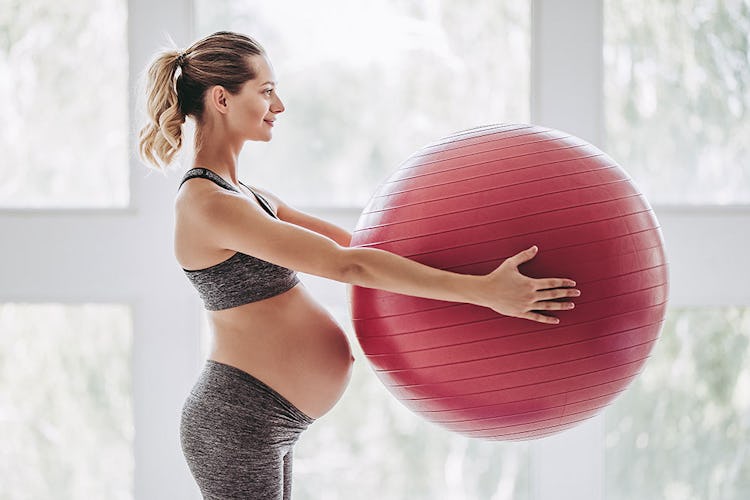
You love to train, but now you’re pregnant. Congratulations! So the question now is, “How can you keep getting great workouts with a growing tummy that won’t upset the baby inside it?” We turned to Hannah Eden (@hannaheden_fitness on Instagram), a trainer and pre- and post-natal certified coach—who also happened to be seven months pregnant at the time of this writing—for tips on how you can stay fit throughout your pregnancy, including exercises that should be doable even with a big belly, and a workout that will prepare you for the rigors of your first few months of motherhood.
Here’s what you can expect of yourself when you’re expecting¦
What Exercises Can I Do When I’m Pregnant?
The first thing you should do is take a deep breath and let it out—working out while you’re pregnant will NOT harm your baby. (Obviously, check with your doctor first to see if there’s any kind of exercise that you should specifically avoid, but if you’re in good health, there’s no reason you should sit on your butt for nine months.) Staying active and pushing yourself will help prevent unnecessary weight gain and keep your fitness level up, so that after the baby comes, it won’t be so difficult to get back into your pre-pregnancy shape.
Eden says that you can gauge the intensity of the exercise you’re capable of by simply listening to your body, and doing training that’s appropriate for your current level of fitness. If you’ve been working out one to two times per week for the past three months or so, consider yourself still a beginner. If you’ve been at it for the last 12 months or more, going to the gym two to three times per week, call yourself an intermediate. Finally, ladies who have worked out two to four times a week consistently for more than a year can consider themselves advanced trainees who can take on the most challenging exercises we present here.
For each exercise you do, rate your perceived effort on a scale of 1 to 10. In other words, if 1 is easy activity that barely registers as effort, 10 is going all-out, as hard as you can. Eden recommends that beginners keep their intensity under a 4, intermediates at a 7 or under, and advanced people 8 or less. You should never approach a 9 or 10, so if you feel yourself starting to struggle, stop and back off a bit.
Additionally, Eden offers the following warning signs that you might be pushing too hard for you or your baby to handle (see 01:48 in the video above):
1. If your belly pushes out, called “coning,” you may be putting too much pressure on your intra-abdominal wall. Stop the set.
2. This kind of goes without saying, but if you lose control of your bladder and wet yourself (or worse), stop. Unexpected leakage can happen suddenly during jumping or other high-impact exercise when you’re pregnant, so take it easy on these movements, and stop if you spill!
3. An inability to speak at a normal cadence due to breathlessness is a warning sign that you’re pushing too hard. Essentially, if you can’t hold a somewhat normal conversation with a friend/partner during an exercise, take it down a notch.
4. If you stop sweating, or feel exhausted, you may be dehydrated. Stop at once. Be sure to drink extra fluids before, during, and after your workout to help prevent this.
5. Another obvious point but it warrants a mention: stop if you feel woozy or like you’re losing your balance. This is a more serious risk toward the end of your pregnancy when your body is really working for two.
6. If you feel an ache in your groin, stop. That could mean extra pressure on your perineum, the tissue that covers the bottom of the pelvic cavity.
How To Breathe During A Pregnancy Workout

(See 02:43 in the video.)
When working out for two, it’s doubly important to breathe properly—that is, breathing into your belly rather than your chest. Doing so enhances stability when you train, lessening the risk of injury, while also maximizing the amount of air you can take in and circulate to your muscles. Before you do your workout, take a few moments to practice your breathing as follows.
Step 1. Stand tall and tuck your tailbone slightly so your pelvis is level with the floor. Place one hand on your belly and one on your lower ribs and breathe in, trying to expand your abdomen 360 degrees. Think about directing the air into your belly, sides, and back.
Step 2. As you breathe in, relax the muscles in your pelvic floor. These are the muscles you’ll use to push the baby out, so get connected to them. It may help to imagine your sit bones separating as you take the air in.
Step 3. As you exhale, contract your pelvic floor as if squeezing the air out. That’s one rep.
Do 2–3 sets of 8–10 reps.
The Best Pregnancy Workout

Eden chose the following exercises for two main reasons: they’re tried and true muscle and strength builders, and they also mimic the kinds of activities you’ll need to perform once the baby comes—i.e., standing up with a bundle of joy in your arms, carrying the baby upstairs, picking him/her up, and so on. One prominent feature of this workout is the use of off-set loads, meaning that you’ll lift two weights at a time and one is heavier than the other. This imbalance will challenge your ability to stabilize your body and even things out, just as you have to do when you’ve got a baby in one arm, on one hip, etc. (Switch the heavier load to the opposite side each time you repeat the exercise to ensure balanced training.)
DIRECTIONS
(See 04:40 in the video.)
Perform the following exercises as a circuit, completing one set of each in sequence. Rest as needed between exercises, and then rest again at the end of the circuit. Repeat for 4 total rounds. Select the appropriate version of each exercise according to your experience level (beginner, intermediate, or advanced), and choose loads that allow you to stay in the intensity range for your experience level (a 4 or below, 7 or below, or up to 8). In other words, use weights that are challenging but will allow you to perform all the required reps with good form and no straining.
1. Swiss-Ball Wall Squat
(See 05:05 in the video.)
Reps: 10
Beginners:
Step 1. Place a Swiss ball on the floor against a wall and stand with your back to the ball, feet hip to shoulder-width apart.
Step 2. Bend your hips and knees and squat until your butt lightly touches the ball. Drive through your heels to come back up. You can extend your arms in front of you to help you balance during the squat.
Intermediates:
Step 1. Place the Swiss ball against the wall and rest your back against it to hold the ball in place. Get into your squat stance.
Step 2. Press into the ball as you squat as low as you can without your pelvis tucking under. Drive through your heels to stand back up.
Advanced:
Step 1. Set the Swiss ball against the wall and lean back against it while holding a kettlebell with both hands. Drive your shoulder blades back and together and brace your core.
Step 2. Squat as low as you can without your pelvis tucking under, and drive through your heels to come back up.
2. Off-Set Suitcase Carry
(See 06:18 in the video.)
Reps: Walk 20 yards
Beginner:
Step 1. Place two weights of different loads on boxes or benches set to the outsides of your feet, and stand with feet shoulder width. The boxes/benches should elevate the weights several inches above the floor, so you don’t have to reach so far to grasp them. Both weights should be light, but one can be 2.5–5 pounds heavier than the other.
Step 2: Hinge your hips back, keeping a long line from your head to your tailbone, and grasp the weights.
Step 3. Extend your hips to stand tall, finishing with the weights at your sides and your shoulder blades drawn back and together.
Step 4. Start walking forward using small steps—think heel to toe. Keep your shoulder blades back and your chest proud. When you’ve walked 10 yards, turn around and walk back to the platforms you took the weights off and return them (20 yards total).
Switch the weights to the opposite hands in the next round of the circuit.
Intermediates & Advanced:
More experienced trainees can increase the challenge by using heavier weights, creating a slightly greater discrepancy between the two weights (opt for a five to 10-pounds difference), or by walking backward. If you opt for the latter, walk 10 yards forward and then 10 backward—have a spotter/partner around to watch and make sure you don’t stumble.
3. Swiss-Ball Pushup
(See 07:23 in the video.)
Reps: 10
Beginner:
Step 1. You don’t need the Swiss ball for this version. Place your hands on a wall at shoulder-width apart. Spread your feet apart wide enough so that you feel balanced, and position them far enough away from the wall to make the exercise challenging (the closer your feet are to the wall, the more upright your body will be and the easier the exercise will feel). Tuck your tailbone so that your pelvis is perpendicular to your spine, and brace your core.
Step 2. Lower your chest toward the wall, keeping your body in a straight line with your abs braced. Tuck your arms 45 degrees to your sides as you lower, and go until you feel a stretch in your chest. Press yourself back up.
Intermediates:
Step 1. Place a Swiss ball against the wall and grasp its sides at arms’ length.
Step 2. Perform pushups against the ball, bracing it on the wall with your hands. Squeeze your triceps at the top of each rep.
Advanced:
Perform the pushup on the ball as shown, but with your feet further away from the wall so that the ball must support more of your body.
4. Lunge With Off-Set Load
(See 08:33 in the video.)
Reps: 10 (each leg)
Beginners:
Step 1. Place a weight on a box or bench as you did for the suitcase carry above, and hold a PVC pipe, dowel, or other object for stability. Hinge your hips back to reach down and grasp the weight with your free hand.
Step 2. Extend your hips and knees to stand tall. Now reach the pipe out in front of you to the length of your lunge stride. Using the pipe to mark the distance, lunge forward with one leg, planting your foot next to the pipe, and bend both knees until your front knee is 90 degrees and your rear knee is just above the floor. Come back up, and then repeat on the other leg, lunging in one place.
Intermediate:
If you feel strong and well enough to keep your balance without the pipe, place another weight on the benches/boxes so you have two loads and ditch the pipe. One weight can be heavier than the other. Perform walking lunges, alternating legs and stepping forward on each rep until you’ve done 10 reps on each side across the room. Stop a moment between reps to reset your feet and keep your balance.
On your next round of the circuit, switch the weights.
Advanced:
Perform the lunges with weight in both hands, but don’t reset between reps. Walk fluidly across the room.
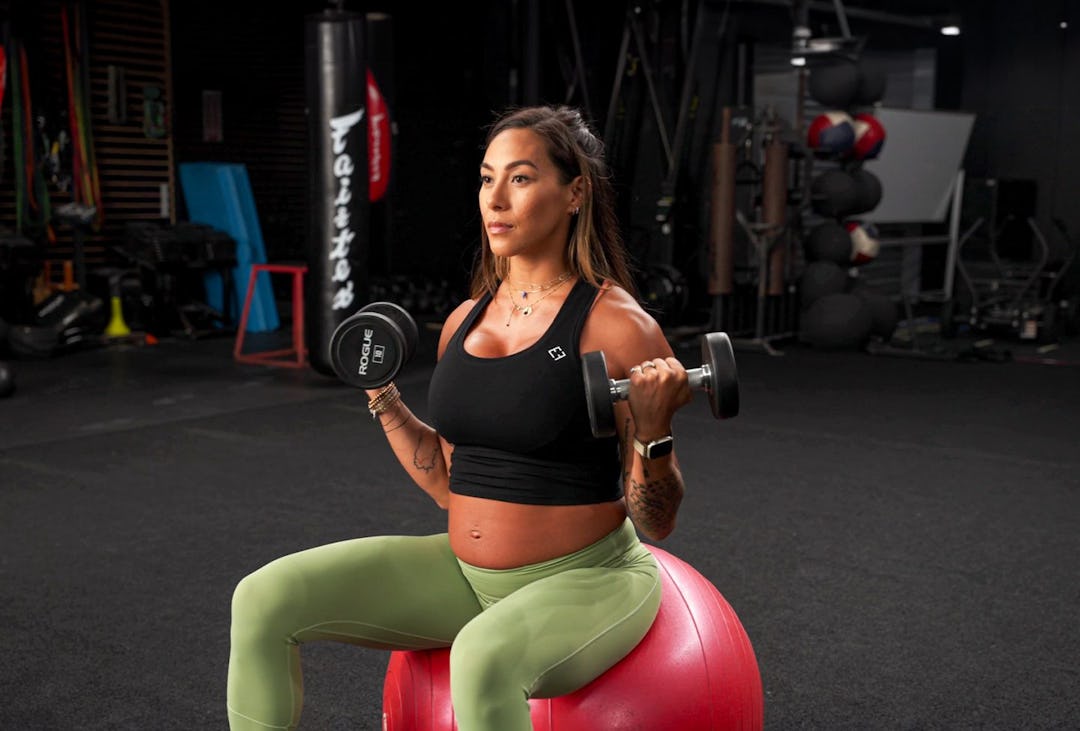
5. Swiss-Ball Biceps Curl
(See 09:58 in the video.)
Reps: 10
Beginners:
Step 1. Hold a dumbbell in each hand and sit on a Swiss ball with feet set hip to shoulder-width apart. Sit up tall with your pelvis level to the floor and your core braced, and turn your palms out away from your sides.
Step 2. Keeping your upper arms close to your sides, curl the dumbbells, and then control their descent back down. Do your reps slowly so you can maintain balance on the ball.
Intermediates & Advanced:
Do the exercise the same way as the beginner level, but you can challenge yourself with heavier weights, or offset the load as you see fit.

)


