In my opinion, the two most important skills to train, as far as flexibility goes, are splits and bridges.
This way you improve the flexibility in your hamstrings, hip flexors, adductors, back, and shoulders. It doesn’t matter what range of motion you have to start with because there are variations of both exercises that you can do at any level. So many people don’t train these because of the assumption that they are “advanced skills.” It’s the same thing as learning to walk before you run; there are progressions for everything.
When I do splits with my clients, I always do over splits, meaning that we elevate one of the legs. This isn’t because all of my clients can do the full splits and we need to make it harder, quite the opposite is true. The reason for elevating a foot is to target specific muscle groups. Even though you will always be stretching all of the muscles involved, it helps to target different muscle groups to change the focus. For all stretches, you never want to hold them for a particular amount of time. I always get my clients to stay in a stretch based on their breathing.
The breathing is the most difficult part of stretching and it’s also the most important. By counting your breaths while you’re in a sensory rich position it gives you something other than the pain to focus on, and it will also make sure that you can relax more into the stretch, which will make sure that you’re stretching it in a safe manner.
When you’re about to work on your flexibility, you’re going to need to do a warm up first. If your body isn’t warm at all, make sure you do a little bit of cardio or simple strength exercise to get the blood flowing to the muscles. After that, you want to start with some joint lubricating stretches. This means that you want to do things like arm circles or hip circles; anything that’s going to move the joints and get a little more sinovial fluid to the joint.
As you start to stretch the muscles, the best technique is to work head to toe. As you’re working through your passive stretches, make sure that if you come across an area that is tighter than others, spend a little more time in that position. Take 5 breaths instead of 3 for example. Once you’re warmed up, you can move on to the stretches that are going to push your range of motion to the max. This is where you would do proprioceptive neuromuscular facilitation (PNF) stretching, partner stretching, and ballistic stretches for the more advanced.
Here’s the splits sequence that I give to my clients and I also do for myself:
Split Round 1: The Warm Up Round
Start with the left foot in front and elevated. Front leg straight, back leg bent. If it’s difficult, grab some yoga blocks or an equivalent object to be able to keep your front leg straight. Now, turn into your middle splits still with your left foot elevated. If it’s too difficult with both legs straight, you can bend the one on the floor. Just make sure you keep the line from your foot to your knee. 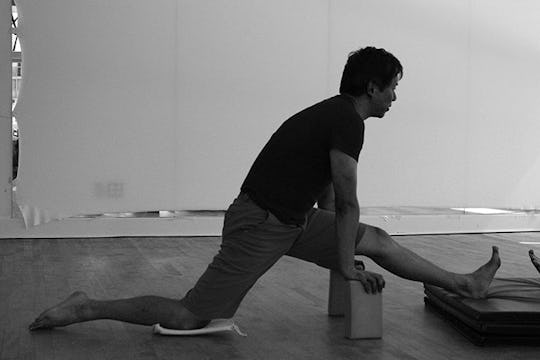 Next, turn one more time so that you have the right foot forward, but you still have the left foot elevated. Back up so that your shin is supported by whatever you’re using to elevate your foot. If you need to modify this one, bend the front leg and put your hands on your knee and make sure you’re still pushing your left hip towards the floor. Finish round 1 by repeating on the other side.
Split Round 2: Focus on Square Hips
Starting with the left foot in front and elevated, put both hands beside your foot. If this is comfortable, you can progress by putting both hands on the side of your baby toe. Turn to your middle splits, this time both legs straight! Turn once more so that your rear foot is elevated. 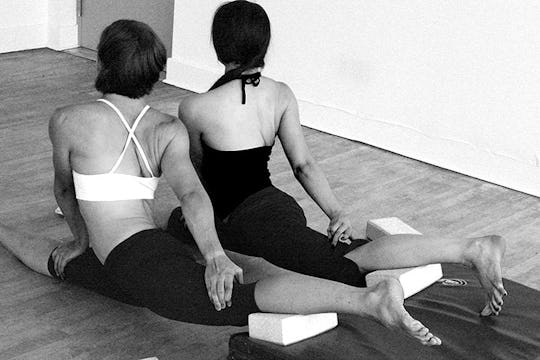 The right leg should be in front, so place your right hand on your back leg. If you need to use a yoga block to keep your shoulders square feel free. If this is comfortable, you can place your left hand on your right leg. Again, repeat other side.
Split Round 3: PNF
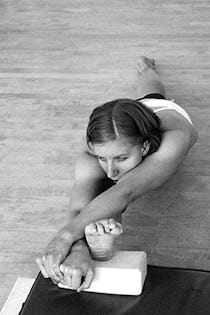 This is where the magic happens! Proprioceptive Neuromuscular Facilitation is a form of stretching that will help you go further and gain range of motion. It is done by contracting the muscles eccentrically in a stretch and then relaxing into the stretch. There are many ways to apply this method.
The way I do it is a contraction of 5-10 seconds followed by a relaxation of 5-10 seconds. Repeat 3 times and finish with a deep breath and try and relax the maximum amount that you can as you do your final exhalation. Round 3, left leg in front and elevated,no hands for advanced. Contract your muscles as though you’re trying to stand up out of your splits, then relax all your muscles and sink into your splits. Again contract, and then relax. Last time contract as hard as you possibly can, and then relax, take a deep breath, and once again relax as deep as you can into the stretch.
Turn to your middle splits, hands on the floor, flex your feet and repeat the PNF sequence. Once you do the final turn, you want to have your foot on the elevated surface instead of your shin like we did in the last two rounds.
For this one, when you contract your muscles you want to also straighten your back leg. When you relax try to keep the back leg straight, but focus on relaxing. Next we’re going to get into doing bridges targeting each part of the back. If you can do a bridge on the floor, then do it on the floor. If you can’t do a bridge on the floor, whether by lack of strength or lack of flexibility, you can still do all of the exercises with a wall bridge.
Bridge Round 1: Upper Back
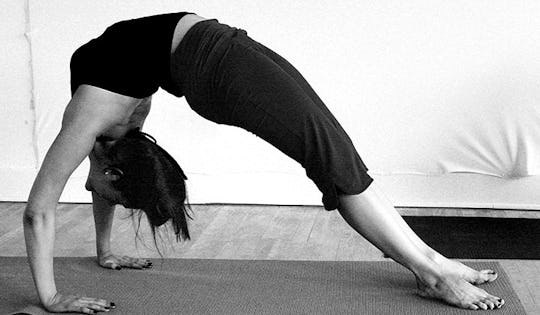
The first bridge you’re going to do is targeting the upper back. Go into your bridge, and looking at your hands (as you ALWAYS do in your bridge you will try to straighten your legs and get your shoulders above your hands. When you reach your limit you hold it there for 3 deep breaths and then come down. Repeat 3 times. Make sure that you always stretch your back in the opposite direction between every back bending exercise. Repeat on the other side, and your splits are done. 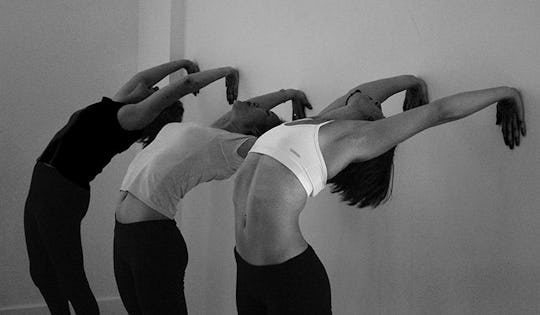
Bridge Round 2: Lower Back
The second bridge is for your lower back. Push up into your bridge, look at your hands, and move your hands as close as you can to your feet. Even if that means moving 2mm closer, if that’s as far as YOU can, then you are doing the exercise correct. Again, at your max, take 3 deep breaths and come down and rock back and forth on your back or do a forward bend to release the strain of training the flexibility of your back. Repeat 3 times. 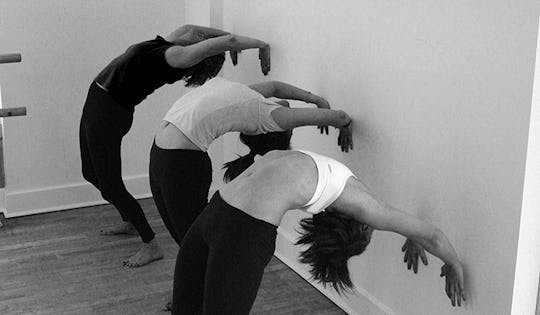
Bridge Round 3: Mid Back
The final bridge is the most confusing.To understand it, stand with your hands above your head and sit down on a chair. That’s all you’re doing, but when you’re bent backwards it becomes a little more confusing. 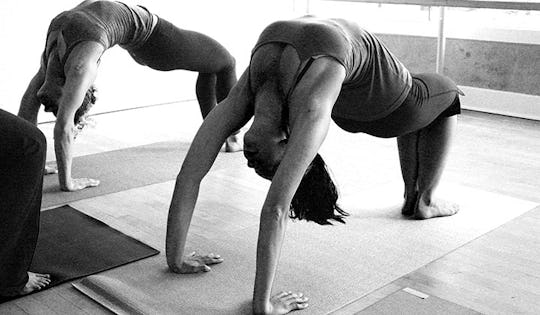 This bridge is more for your mid back. You want to make sure that your knees and your shoulders don’t move, and you’re just going to bend at the knees and the hips as though you’re about to sit in a chair. For this one, the movement will start out quite small, but as you get more comfortable it will start to get bigger and bigger. Do one bridge and sit in a chair 5 times. That’s the end of your bridge workout! Again, I can’t stress this enough, if you don’t know what you’re doing, please see a professional to help you with your technique. Just like any other activity, if you have good technique you will have way less injuries, and you will progress much faster!
)


