The hang clean is an abbreviated version of the barbell clean exercise that you see in Olympic weightlifting competition (there are actually two parts to the Olympic lift—the clean and the jerk). Even if your goal isn’t to hoist hundreds of pounds while wearing a singlet, the hang clean is a great exercise to master, as it builds power that can translate to other lifts you might like to do (such as squats and deadlifts) as well as sports in general. Of course, because the hang clean works so many muscles, it can make you look jacked, and it contributes to an impressive set of traps (the muscles that slope down from your neck to your upper back).
The hang clean, however, is a highly technical movement that takes A LOT of practice to really get down. Follow the advice given here by Zack Telander (@coach_zt), Olympic weightlifting competitor and coach, to master the hang clean and use it to gain muscle, power, and total-body strength.
What Are Hang Cleans and What Are The Benefits of Doing Them?
(See 00:25 in the video above)
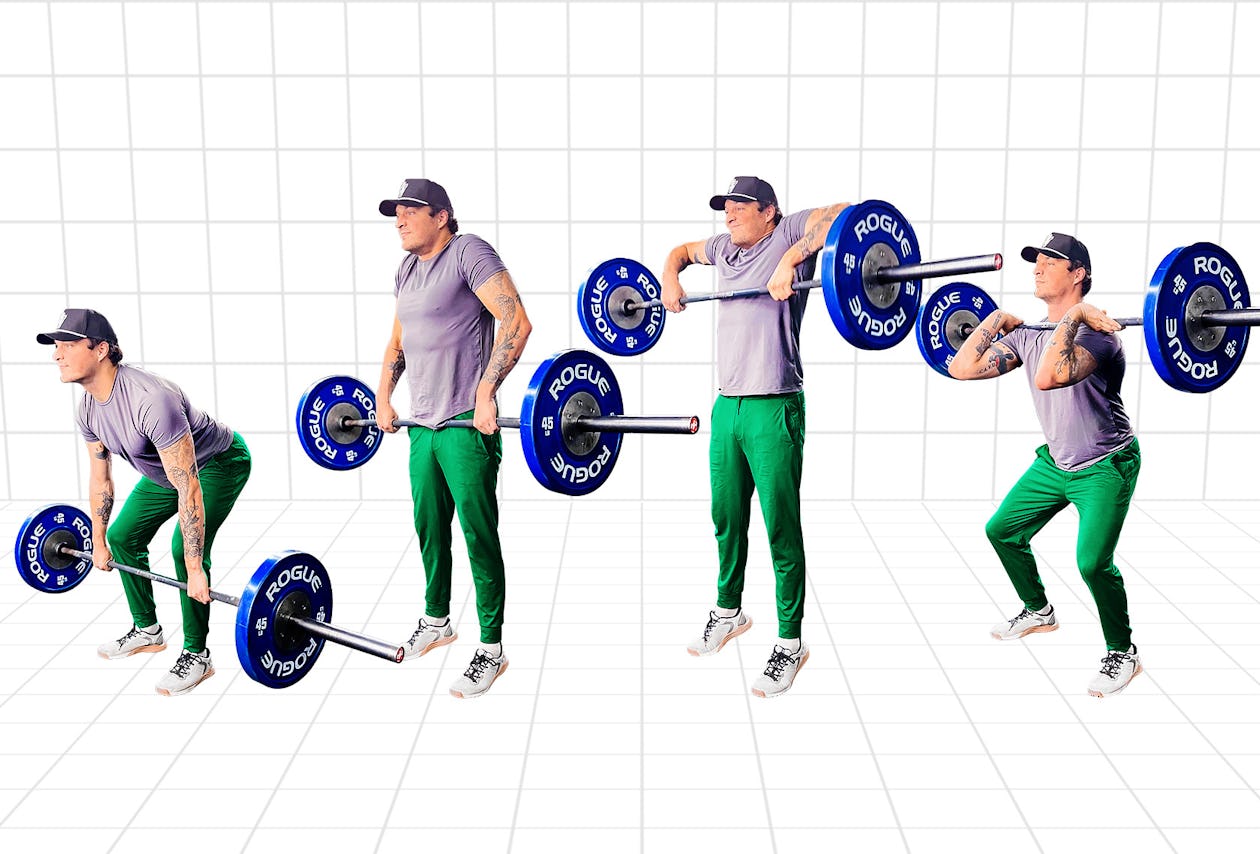
In the full clean exercise, as done in the sport of weightlifting, you start with the bar on the floor and heave it up to shoulder level (called the “front rack” position). In the hang clean, you start the movement already standing straight and then bend your hips back to lower the bar—usually to just below the knees. From there, you explosively extend your hips, knees, and ankles to get the bar up to the rack position. This is done right after you lower the bar, so the stretch reflex kicks in and helps you power the bar up. Because you start in a stronger position, says Telander, the hang clean is a little easier to control than the regular clean, and therefore a better move for beginners to work on.
The hang clean offers numerous benefits. The explosive extension of the hips, knees, and ankles (called “triple extension” by coaches) happens almost simultaneously, producing tremendous power. A football player’s ability to charge forward out of a three-point stance, a basketball player’s jump shot, and a track star’s sprint all owe their power to triple extension. Unsurprisingly, the hang clean almost always figures into the workouts of these types of athletes.
The hang clean also recruits pretty much every muscle you can think of, but particularly the glutes, hamstrings, calves, upper back, and core. Progressively loading the hang clean over time can get you big and strong and change your physique.
How To Properly Execute A Hang Clean

The hang clean is awesome… but it’s not as easy as doing a barbell curl or a dumbbell shrug. It’s an incredibly technical movement that’s going to require a lot of practice to do properly—so be patient. Telander recommends you break the hang clean down into its component parts and work them one at a time. Practice the following with an EMPTY barbell.
Part 1: The Front Rack
The first thing to familiarize yourself with is the front rack position—holding the bar at your collarbone/shoulder level. This is the last part of the clean movement—where the bar finishes—but Telander likes to drill it first because it’s the easiest part of the lift to get down. It also sets you up for presses and jerks, which you’ll want to progress to after you have the hang clean under your belt.
Step 1. Stand with your feet between hip and shoulder width and hold the bar at arm‘s length with your hands at shoulder width. Your hands should be about thumb length from the outside of your thighs. Now press the bar overhead.
Step 2. Lower the bar with control until it’s at shoulder level, and point your elbows forward as you bring it down. This should allow the bar to settle just above your clavicle in the front rack position. If you lack mobility in your wrists, upper back, or shoulders, you may have difficulty holding onto the bar. Your hands can open to allow you greater range of motion, but don’t let the bar roll all the way to your fingertips—you won’t be able to control it.
Repeat this motion for several reps and practice it for multiple sets. Your mobility should improve within a few sessions. When you’re confident in your front rack, move on to the next component.
Part 2: The Muscle Clean
The muscle clean is where you’ll work on popping the bar from your hips to your chest—the stage right before you finish in the front rack. It’s basically an upright row done with momentum.
Step 1. Start with the bar at arm’s length in front of you again.
Step 2. Row the bar straight up in front of your body, raising your elbows high and out to your sides. As the bar reaches your chest, push your elbows forward and under the bar so you end up in the front rack. Essentially, “as soon as you feel you can’t pull the bar any higher with the grip you’ve taken,” says Telander, “you’ll want to begin turning your elbows over.”
Be careful not to lift the bar too high so that it flops over and bounces into the front rack. You want to pull it fast, but don’t let momentum take control away from you.
Practice this for several workouts, and integrate it with the front rack. At this point, you’ll have two-thirds of the hang clean down pat.
Part 3: The Contact Drill
Now you’re ready to practice getting the bar in contact with your legs and beginning the explosion upward.
Step 1. From the same standing position, bend your knees slightly and then bend your hips in order to lower the bar to mid-thigh level.
Step 2. Let the bar drift away from your body and then, using only your arms, snap it back so it touches your thighs again. As soon as you feel it hit your thighs, extend your hips and knees and go into the muscle clean you learned in Part 2. You don’t have to raise the bar all the way up to your chest though. Keep the movement between your thighs and about sternum level so you can focus on that initial hip and knee drive. The bar should glide up in a straight line, just in front of your shirt.
When that feels natural, try integrating the contact drill with the full muscle clean and finishing in the rack position. Then, when that feels strong, you can begin to catch the bar in the front rack position by jumping and descending into a quarter-squat. As you come up in the muscle clean, use enough power so that your feet leave the floor and you come back down bending at the hips and knees to absorb the force.
Hang in there, no pun intended. You’ve got almost the entire hang clean movement now.
Putting It All Together
The hang clean can begin just above or below the knees, depending on how you want to implement it in your training. For those just learning the clean, Telander likes to begin from below the knee at about mid-shin height, as that’s the safest way to practice the hang clean and reinforces good technique.
Practice the integrated hang clean drills you’ve already worked on, but instead of beginning the contact drill with the bar drifting in front of you, you’ll begin with the bar in contact with your legs at mid-shin. Start from standing, take a breath in and hold it, and bend the hips and knees until the bar is low enough. As soon as you reach that position, begin extending your hips and knees and clean the bar to the front rack. Exhale, drop the bar back in front of you with control, and repeat.
When you feel good about your form, you can add weight to the bar. Start with 25-pound plates, and you may need to elevate the bar on some blocks or mats so that you can set up with the bar at mid-shin. When you work up to using 45s on each side, the bar will be high enough just sitting on the floor. (If you have rubber bumper plates, any weight you use will be the same diameter and therefore the same distance from the floor).
How To Choose The Right Weight For The Hang Clean (Plus, Sets and Reps)

The hang clean is meant to be loaded heavy, so you can build as much muscle and strength as possible. But when you’re new to the lift, you need to go light so you can master good technique. Start with no more than 45 pounds on each side (again, lighter weight with the use of bumper plates is even better, if you have access to them). “Go for 5–10 sets of 1–3 reps,” says Telander. As you get better, you can work up to sets of as many as 5 reps, but you should rarely go higher than that. The more reps you perform, the more fatigue you’ll accumulate, and fatigue causes form to break down and can lead to injury, or, at the very least, sloppy hang cleans that don’t have the desired training effect.
Five to 10 sets seems like a lot, doesn’t it? Remember, this is Olympic weightlifting, not bodybuilding, and the emphasis is on technique and power—not muscle failure. You want to do a fair number of sets to ingrain good form, so think of them as practice. A set of hang cleans should end when you feel you can’t do another rep with perfect form, not the point where you’re straining to even get the bar moving. It’s a different kind of training than most people are used to, and it requires a different mentality.
What Muscles Do Hang Cleans Strengthen?
The hang clean is truly a full-body movement, as it involves so many muscles to take the bar from near the floor up to your collarbone. With that said, weightlifters often sport impressive trapezius muscles, thick upper backs, and dense glutes and hamstrings. Beyond the changes you’ll notice hang cleans have on your physique, their main benefit will be to your athletic potential. Telander says hang cleans build the muscles and the neuromuscular coordination necessary to jump higher, run faster, and lift more weight, particularly on exercises that use similar body mechanics, such as the squat and deadlift.

How To Stretch Before Doing Hang Cleans
We mentioned above that the front rack position can be awkward for many people. The hang clean also demands a lot of mobility in the hips and hamstrings. Therefore, Telander recommends these two drills that can help open up the areas that allow you to control the bar better throughout the hang clean’s range of motion.
Front Rack Banded Stretch
Step 1. Grasp an elastic exercise band (preferably a loop band as opposed to a tube) with your right hand and stand on the other loop with your right foot.
Step 2. Get into the front rack position and then raise your arm overhead so your elbow points to the ceiling and the band pulls on your arm in a straight line from behind your back. Allow the band to stretch your arm—you should feel a strong pull through your triceps and back. Pull your ribs down so you don’t hyperextend your spine, and brace your core. Hold the stretch for 30–60 seconds, and then repeat for 2–3 sets, or until you feel that your front rack position has improved. Do the stretch on both sides.
Bodyweight RDL
Step 1. Stand with feet at hip width and bend your knees slightly.
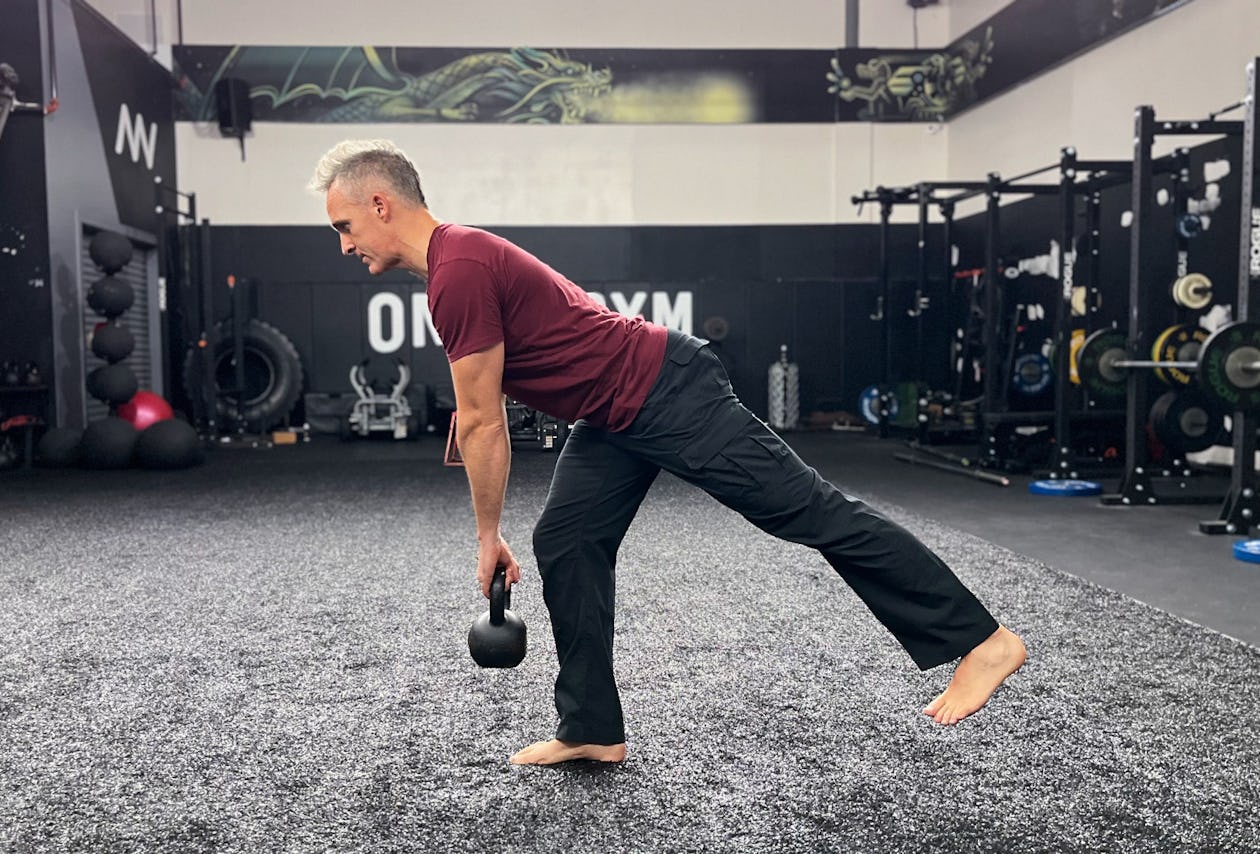
Step 2. Push your hips back as far as you can while keeping a long spine from your head to your tailbone—don’t lose the arch in your lower back. You’ll feel a strong stretch in your hamstrings. Do 2–3 sets of 10–20 reps. You can also use the exercise band you had for the front rack stretch to increase the intensity: stand on the center of the band while holding a loop in each hand. Yet another option: use a kettlebell.
Hang Clean Alternative Exercises and Variations
If you’re having trouble with the hang clean, back off to a less complicated exercise that shares similar mechanics but is less technically demanding. The Romanian deadlift and kettlebell hang clean build strength and power in the hips and will help you get familiar with the hip extension movement you need to be proficient at hang cleans when you go back to them.
Romanian Deadlift (RDL)
See the description for the bodyweight RDL above. The exercise is essentially the same, but now you’ll add weight, performing the lift with a barbell. Perform 2–3 sets of 5–10 reps.
Kettlebell Hang Clean
While the kettlebell hang clean is easier to master than the barbell version, it offers a different kind of challenge and a unique array of benefits. You’ll use two kettlebells at once, which means your body will have to stabilize two weights independently, and this is helpful for simulating the chaos that comes in real-life sports play.
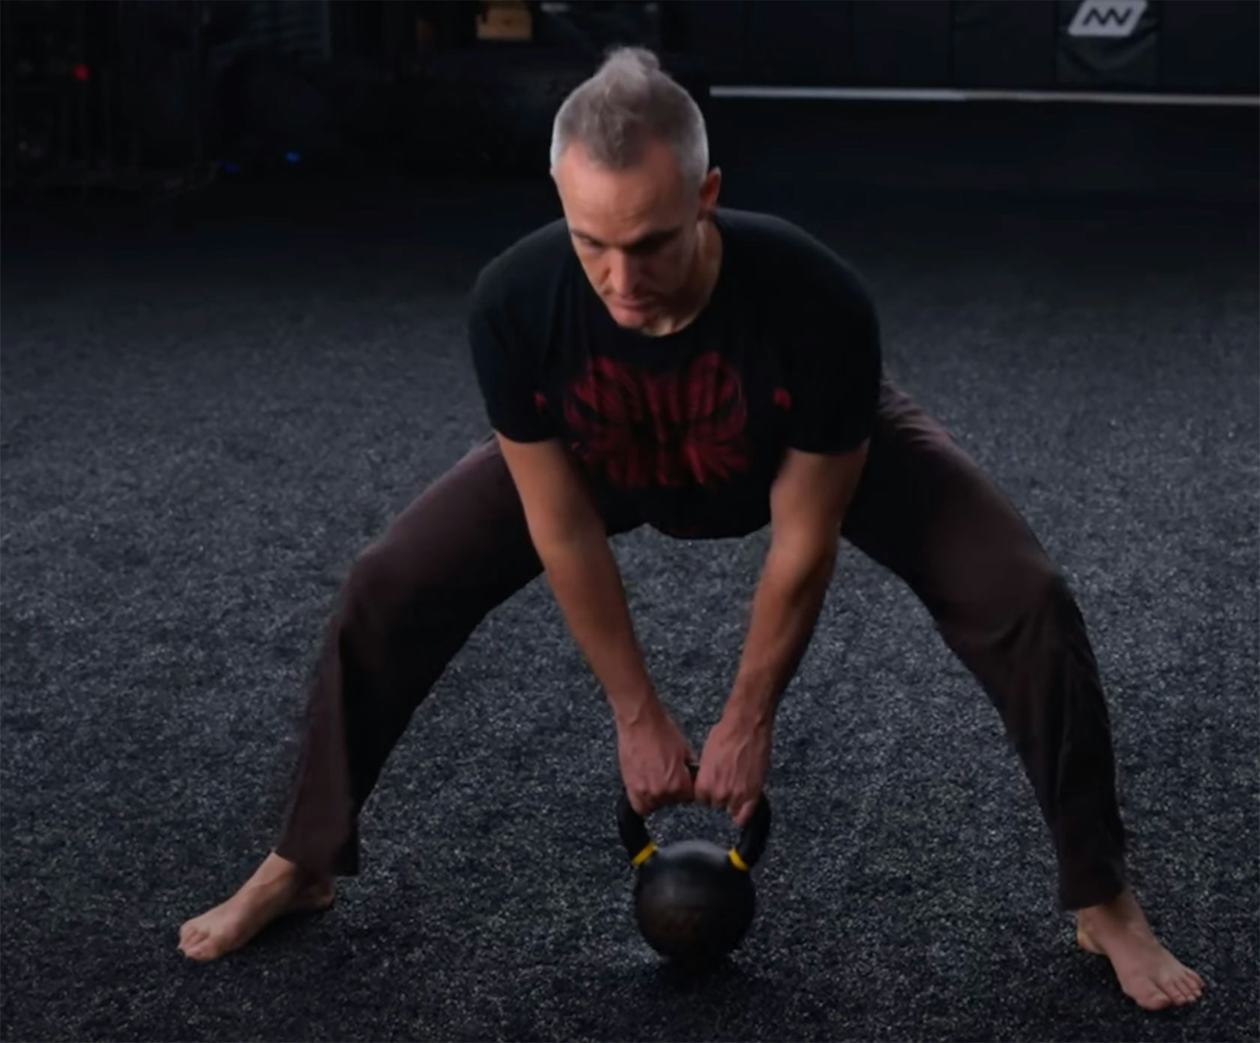
Step 1. Stand with feet outside shoulder width and hold a moderate-weight kettlebell in each hand.
Step 2. Bend your hips back and, when you feel a stretch in the hamstrings, explosively extend your hips and pull the kettlebells up in front of your torso. Drive your elbows back against your sides as you do this—this will help you avoid flipping the kettlebells over your wrists so they slam into the back of your forearms, a common (and painful) mistake. Then drive your elbows forward. The weights should end up just under your chin (basically the same rack position as in the barbell hang clean).
Perform 2–3 sets of 5–10 reps.

Tips On How To Avoid Mistakes and Getting Hurt
The hang clean isn’t any more dangerous than virtually any other barbell lift, but it can be trickier. You absolutely must pay attention to your form at all times. Telander says to think about the three parts to the lift that he described above as a spectrum—you’re free to go back and forth between them and revisit a section as needed when you recognize that one part needs work. “If you struggle with the full hang clean,” says Telander, “you might need to go back and work on the contact drill.” Likewise, if you feel off on your contact drill, go back and drill the muscle clean some more. Each part sets you up better for the one that follows it.
Telander also cautions not to think of the clean as a reverse curl with momentum—a very common mistake. You’re not heaving weight up with just your back and biceps. “Think ‘elbows high’ when you do the muscle clean,” he says, so you row the weight up rather than sling it.
It’s also a good idea to hire a coach to observe your form and correct it on the spot. USA Weightlifting can connect you with such a person (many CrossFit boxes have weightlifting-certified coaches as well). At the very least, video yourself so you can look at what you’re doing and gain awareness. Having a training partner is a good idea too.


